Securing 3D nail charms and crystals with Semilac Hybrid Polish top coats
Stop losing your 3D nail charms! Learn how to secure crystals and ornaments using Semilac top coats for weeks of flawless wear. Master the art of 3D durability.
Three-dimensional nail art looks stunning until a charm lifts or a crystal falls off – and that failure comes down to top coat application. Securing 3D elements takes a different approach than finishing a flat design: viscosity, tack windows, and coverage all matter. This guide covers how to keep 3D nails charms intact through weeks of wear with Semilac Hybrid Polish top coats!
Here is what this guide covers:
- why 3D elements lift and fall off – and what actually causes it
- how to apply top coat over 3D nail charms and crystals without flooding the detail
- which mistakes to avoid and how to extend wear time significantly
Why do 3D nail charms lift or fall off?
3D elements lift when top coat is applied too thin, too late, or only over the top of the element instead of working it under the base. In practice, the top coat step is where things go wrong most often – not the glue or the crystal quality. When a charm lifts, it is usually because the top coat sealed only the perimeter, leaving no real bond between the base of the element and the nail surface.
Crystals and 3D flowers have edges that trap air. If top coat is brushed over the top without pressing down at the base, that air pocket remains, and the element will rock slightly under pressure until it releases. Gel-based UV Hybrid top coats have a viscosity advantage here – they stay workable long enough to let you press each element into place before cure. Water-thin formulas cure too fast at the edges and lock in gaps.
Surface contact and cure-cycle stress
A flat rhinestone bonds differently than a raised 3D bloom flower – the 3D shape means less nail plate contact and more stress on each cure cycle. The attachment needs to be built up in layers, not achieved in one coat. Rushing this step is the most common reason Gel Nail Polish nail art arrives at the next appointment missing a piece.
How to set charms and crystals with top coat
Place the element into a bead of uncured top coat rather than setting it on a dry nail and sealing over it. Apply a small drop of gel top coat to the placement spot, position the charm or crystal, and press gently into the uncured gel. The element sits inside the top coat, not on top. Press 3D elements into uncured top coat rather than curing a base layer first – the single most reliable technique for long-term adhesion.
Cure that first layer fully. For larger 3D elements, add a second top coat application around the base of the element – not over the top of it. Use a small, stiff detail brush to work the top coat underneath the edges and around the perimeter. Semilac Hybrid Polish gel tops have enough body to hold position during this step without running. Crystal Nail Art applications with dimensional pieces often require this two-stage approach to sit cleanly without visible lifting.
The final gloss layer over raised elements
The final coat is about gloss and surface leveling. At this stage, brush lightly over the raised elements with a single smooth pass – do not go back and forth. Two thin top coat passes with a full cure between them builds adhesion without flooding detail on raised 3D blooms. If the element has fine detail you want to preserve – like petal edges on 3D flowers – avoid applying top coat directly over the highest points. Seal the base and sides, leave the tips exposed.
Top coats that work well for 3D nail charms:
- Milky T31 – slightly thicker viscosity fills the base of 3D elements cleanly without running
- Semilac Elastic Acrylgel Crystal Clear – flexible formula works as both adhesive layer and first seal for heavier charms
- Standard no-wipe gel top coats across our Semilac Hybrid Polish range – UV Hybrid gel tops give you a workable tack window that flat lacquer finishes cannot match
Common mistakes, aftercare, and how to extend wear
The most frequent mistake is a single heavy top coat layer cured immediately. Thick application pools around the element base and pulls away from the sides – exactly where it needs to bond. Light and layered always wins. A second mistake is capping the free edge but neglecting the element base.
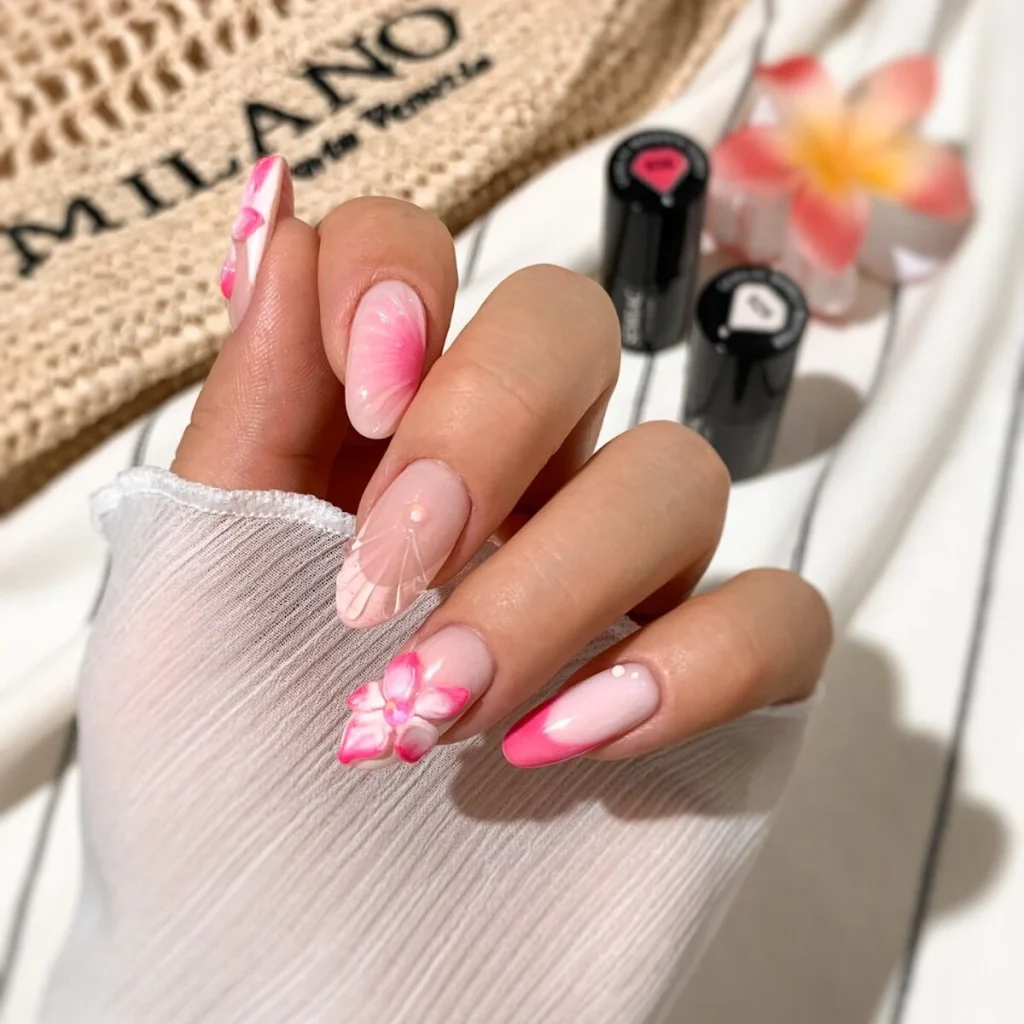
Aftercare matters. Clients should avoid prolonged soaking – long baths stress the seal at the base of each element. For a pink-and-magenta ombre on Barely Butter 929 with 3D blooms on two feature nails, treat those nails gently for 48 hours while the top coat settles. The same applies with Magenta Ticket 936 in the blend.
Saving a lifting 3D nail charms between appointments
If an element does lift at the edge after a few days, seal it immediately with a drop of gel top coat and cure – a partial lift becomes a full release quickly once moisture gets under. For more on building 3D nail art that lasts, check out our guide on applying rhinestones and crystals for lasting nail art.