How to Create Star Nails: Celestial Designs with Semilac UV Hybrid
Hand-paint, foil or stickers? Learn three easy ways to create celestial star nails and keep every detail flawless with Semilac UV Hybrid.
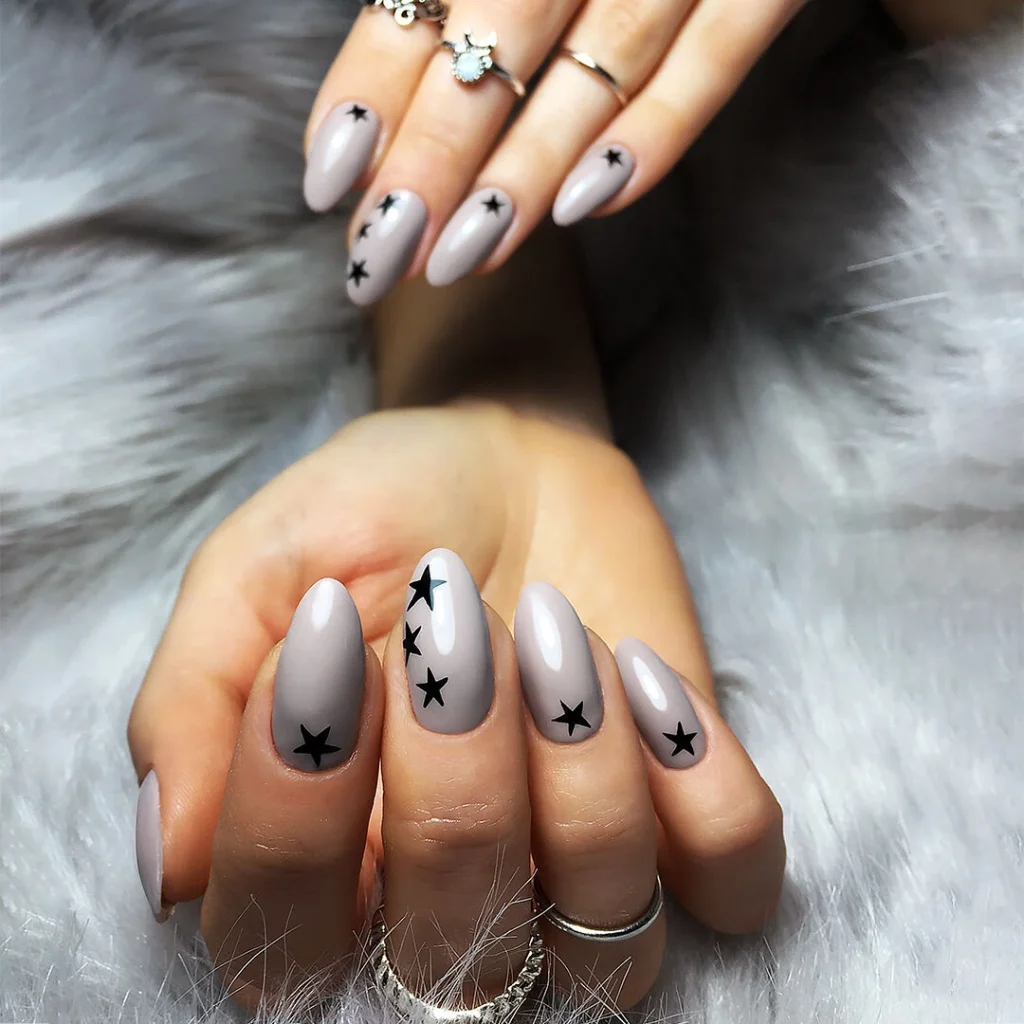
Star nails give you two honest paths: paint them by hand for full control, or drop in foil and stickers when speed matters. The look that started this trend is a matte gray-taupe almond with scattered black stars, no two fingers alike. This guide walks through the tools, the brush technique, the foil shortcut, and the sealing step that keeps points from peeling. Let’s map a sky across all ten nails!
Here is what this guide covers:
- what you need to build clean star nails
- how to hand-paint stars and apply foil or stickers
- how to seal the detail so it survives soak-off and wear
What you need to create star nails
The matte celestial set leans on three products doing the heavy lifting. A muted base reads as sky, a true black draws crisp points, and a no-wipe top decides whether the finish lands matte or glossy. Build the look on Official Grey 224, the gray-taupe that gives stars a quiet backdrop instead of fighting them.
For the stars themselves and the seal, you need two more pieces:
- Black Diamond 031 delivers opaque black in one stroke, so points stay sharp instead of streaky
- Top No Wipe locks everything down and skips the sticky-layer cleanup that can drag fine detail
- a thin detail brush from your kit, plus silver foil or star stickers if you want the mixed-media version
How to hand-paint stars step by step
Hand-painting wins when you want stars of different sizes and angles, the way the celestial set scatters them. Work over a fully cured color coat so a slip wipes off the surface rather than smearing into wet polish.
Load a small bead of Black Diamond 031 and paint each star in five short strokes, outside in to the center:
- Place the center point of the star first, then pull each arm outward.
- Keep arms slightly uneven for a natural, hand-drawn look.
- Cure, then add a second pass only on stars that read too thin.
Vary the count per finger, two or three stars on some, a single large one on others. Keep your hand anchored with the pinky resting on the table so the brush tip moves and your wrist does not. This is where most technicians steady their lines and stop chasing symmetry that real constellations never have.
How to apply foil and sticker stars
When a client wants metallic silver or you are short on time, foil and stickers cover ground fast. Silver foil gives that reflective celestial shimmer that hand-paint cannot match, and stickers hand you identical points with zero brush skill required. Both belong in any Semilac UV Hybrid build, since the gel layers give them something firm to grip.
Press foil into a tacky, uncured layer rather than dry color, then peel the carrier sheet back slowly at a low angle. For stickers, set them on a cured coat and burnish the edges down with an orangewood stick so nothing lifts. Apply foil and sticker stars before the top coat, never after, so the seal traps every edge underneath.
How to keep star details from peeling
Peeling almost always traces back to a raised edge the top coat never reached. Foil star nails and stickers sit slightly above the nail surface, so the goal is to drown those edges in product. Flood a generous layer of Top No Wipe over the whole nail, capping the free edge as you go.
For hand-painted points, the risk is a thick paint dome the top coat seals around instead of flattening. Keep painted stars thin enough that one top coat levels them completely, or float a thin clear gel over chunky areas before the final seal. A clean cap and a level surface carry star nails through two weeks of wear and a normal soak-off later.
Pro tips for crisp celestial nails
The difference between a tidy set and a smudged one comes down to brush load and timing. In our experience, fine detail fails when the brush carries too much gel, so wipe it nearly dry before each star. A celestial nail technique reads best when the spacing breathes, with empty space between points rather than a crowded sky.
Plan the layout first, since star nail art looks intentional when the largest star anchors one nail and smaller ones orbit it. Our range of no-wipe tops lets you finish matte or glossy without changing the design. Cure a test star on a tip first to confirm your black is fully opaque before committing to all ten nails.
Frequently asked questions about star nails
Do I need a special brush to paint stars?
A standard thin detail or liner brush from your kit handles stars well, with no specialty tool required. What matters more is keeping the bristles pointed and the gel load light so each arm stays sharp. A liner with longer bristles helps if you want stars with thinner, more delicate points.
How do I stop foil from lifting?
Foil lifts when it touches a dry or fully cured layer instead of a tacky one, so press it into an uncured gel surface. Burnish the edges down and seal the whole nail under a top coat that caps the free edge. Hand-painted stars made with Hybrid Nail Polish avoid the lifting issue entirely if you prefer a flush finish.
What is the easiest way to start star nail art?
Star stickers are the easiest entry point, since they give consistent points without any painting skill. Once you are comfortable sealing them flat, move to simple five-stroke stars painted freehand on one accent nail. Building up from a single accent finger keeps the learning curve gentle and the result clean.