

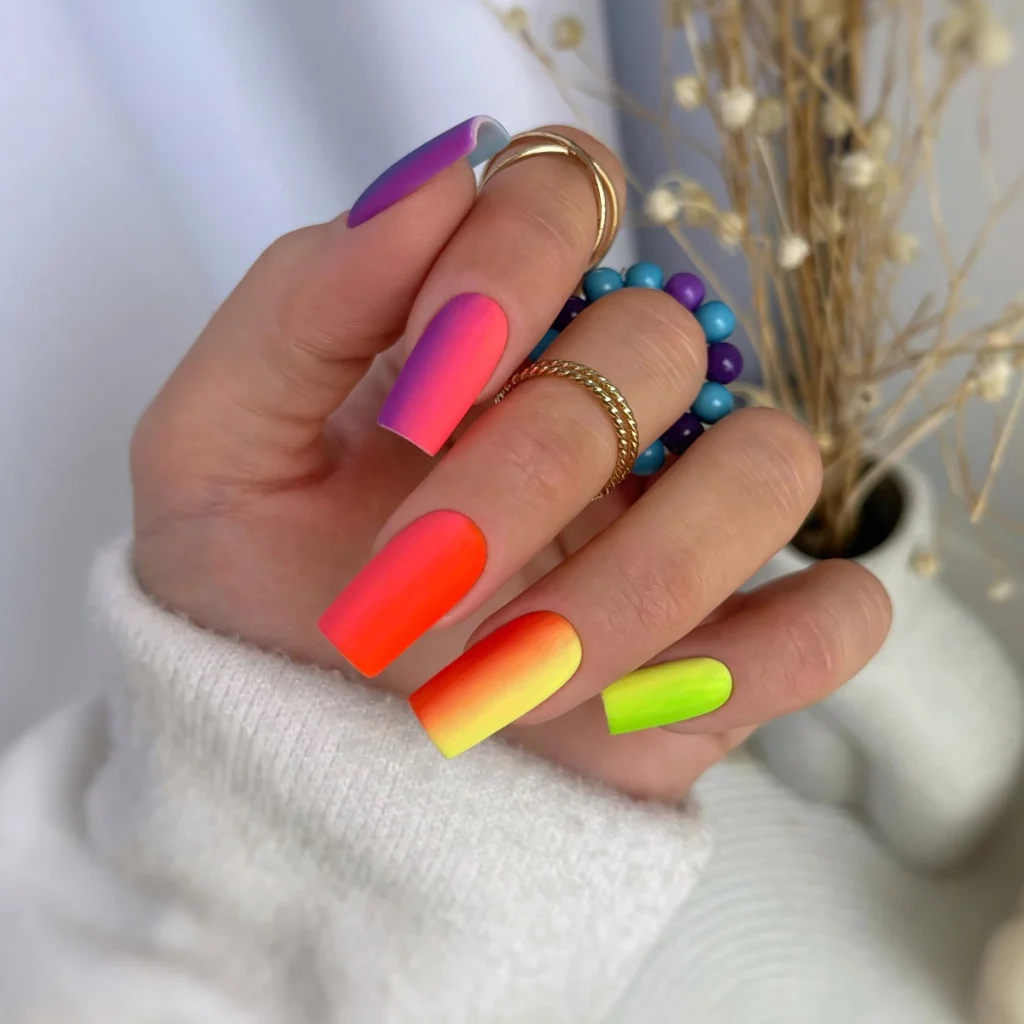
Mastering the ombre nails sponge blending technique with Semilac UV Hybrid
Master ombre nails with the sponge blending technique. Learn how to create smooth gradients with Semilac UV Hybrid and avoid common mistakes!
Sponge blending is one of the most reliable methods for building a smooth gel ombre nails – and with the right approach, it delivers gradients that are hard to replicate any other way. This guide breaks down why sponge technique works so well with Semilac UV Hybrid, how to execute each step cleanly, and where most technicians run into trouble. Let’s get technical!
Here is what this guide covers:
- why sponge blending creates smoother gradients than brush-only methods
- how to build the ombre nails step by step with precise gel loading and curing
- which mistakes cause patchy transitions and how to correct them
Why does sponge blending work for gel ombre nails?
A sponge transfers gel in thousands of micro-dots rather than a continuous film. That texture creates a natural diffusion at the color boundary – something a brush struggles to replicate without a lot of back-and-forth strokes that disturb the gel. The porous structure of a standard cosmetic sponge (typically 60-80 ppi density) gives you just enough spread to soften edges without lifting gel off the nail.
Gel viscosity matters here. Semilac UV Hybrid has a medium-flow formula that sits on the sponge without running or pooling. Thinner gels bleed into each other too fast, thick builders don’t diffuse. Medium consistency keeps pigment load where you press it. From hands-on work, saturated neons and warm corals create the sharpest contrast gradients.
How to build the ombre nails with a sponge
Start with a cured base coat and your first color applied to roughly the bottom two-thirds of the nail. Cure it fully – 60 seconds in a 48W LED lamp. This layer is your base tone and it needs to be solid before the blending starts. Skip this cure and the sponge will drag the base around instead of blending over it.
Cut your cosmetic sponge into a small wedge – about 1.5 cm wide at the tip. Apply the second color and dab off excess. Load the sponge with a thin layer of gel, roughly 0.5 mm thick – too much product builds ridges. Press the sponge at the transition zone with a light bouncing motion, moving toward the free edge with each press. Do not drag. After 3-4 presses, cure 30 seconds (no wipe), assess, then repeat until the gradient reads continuous.
The shades that work best for high-contrast ombre:
- Go Peru 538 – warm terracotta base that fades cleanly into pinks and neons
- Tropical Flamingo 445 – vivid coral with strong pigment load, ideal as the upper gradient color
- Semilac HEMA Free Neonz 447 – electric neon finish from the HEMA-free range, builds luminous ombre edges
- Captain’s Blue 449 – deep cool blue that grounds a two-tone ombre when used as the base layer
Sealing the gradient cleanly
Once the gradient is built, finish with a thin layer of Gel UV Hybrid top coat applied without pressing into the gradient. Cure fully for 60 seconds. Avoid wiping the nail between gradient layers – any alcohol or cleanser at that stage disturbs the uncured surface and ruins the diffusion.
Common sponge blending mistakes
The most frequent issue is overloading the sponge. When there is too much gel on the tip, each press deposits a visible band rather than a diffused edge. The result looks striped, not graduated. The fix: dab the sponge on a palette twice before pressing to the nail, and keep gel layers thin throughout.
Another problem is skipping partial cures between sponge passes. Gel stays workable under LED for about 90 seconds before it starts to self-level unpredictably. If you do 5-6 sponge passes without curing, the colors begin to bleed into each other and you lose the clean gradient edge. Cure for 30 seconds after every 3-4 sponge presses to lock in each pass before building the next. This gives you precise control over how far the blend travels toward the cuticle.
Color mismatch and sponge contamination
Color mismatch in the transition zone is common with Ombre Gel Nails combining a light and very dark shade. A muddy overlap usually means the sponge picked up both colors at once. Use a fresh sponge section for each pass. We recommend cutting several wedges before the service.
For more on accessory choices, check our guide to must-have accessories for hybrid manicures. Hybrid Nail Polish ombre technique relies on tools as much as shades – sponge density makes the result easier to repeat.