

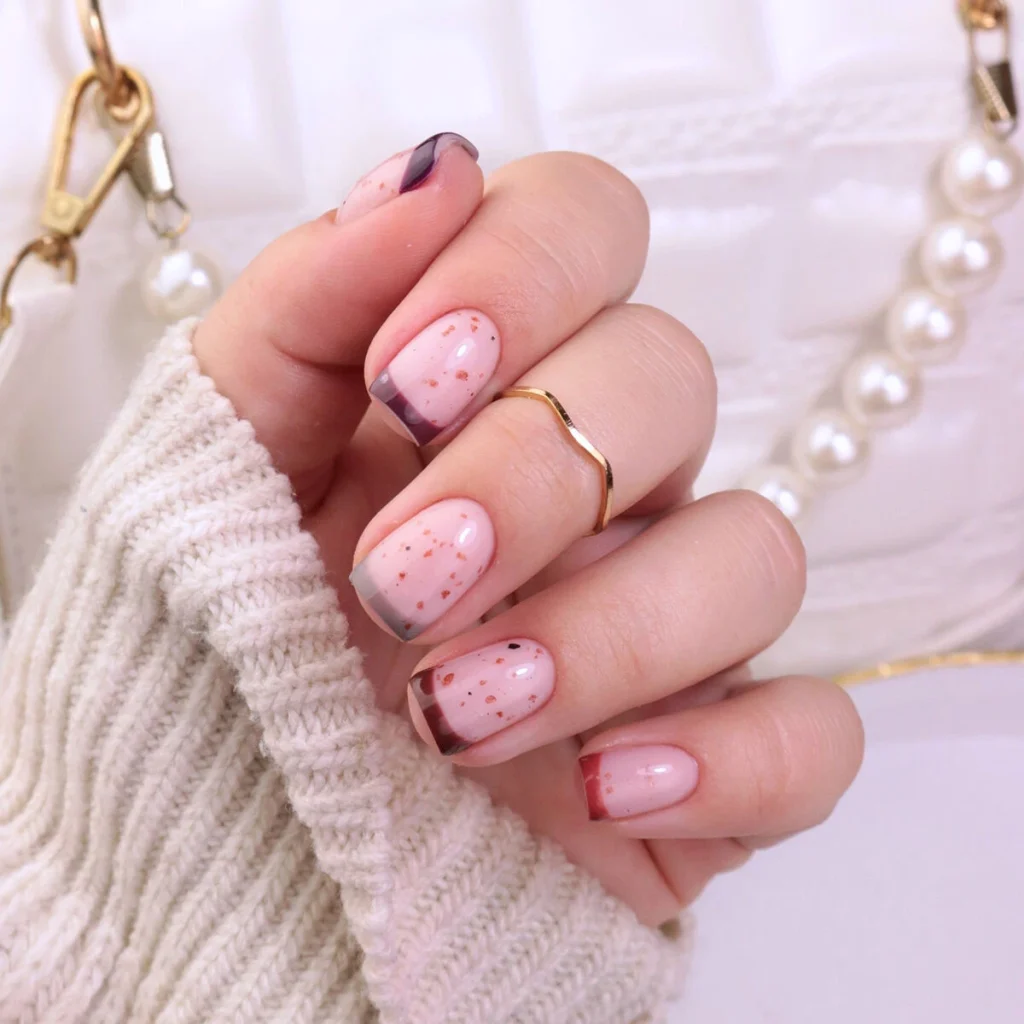
How to Combine French Tips and Polka Dots with Semilac Hybrid Polish
The order you work in decides whether this design reads as crisp or cluttered. French polka dot nails only land when the smile line goes down first and the dots sit on a fully cured surface. Get the sequence right and the rest is placement and patience. Here is how to build the look without smudging or second-guessing!
Here is what this guide covers:
- what tools and shades you need before you start
- how to layer the french line and the dots in order
- how to seal the design so nothing shifts
What you need to combine french tips and dots
A dotting tool, a fine liner brush, and a clean base are non-negotiable here. For the dots, pick shades with strong opacity so a single touch covers without a second pass. A warm trio works across most skin tones, which is why we reach for Plum 015 on the dotting end. Hot Chocolate 941 adds a richer, deeper accent on nails where the french is very pale.
For a softer, almost caramel contrast against a nude french, Marrom Choco L20 sits beautifully. Keep two dotting tools on hand: a 1 mm head for tip dots and a 1.5 mm head for the base. The whole look runs on Semilac Hybrid Polish, so opacity and self-leveling are doing half the work for you.
How to paint a clean french line first
The smile line carries the design, so it cures fully before a single dot lands. Float the tip color in two thin coats rather than one thick one, and let each coat flash-cure before the next. A short flat brush angled at 45 degrees gives the cleanest arc with the least drag.
Wipe the brush after every stroke so the edge stays sharp. If the line wavers, fix it now while the surface is bare, not after the dots are down. A clean nail wipe with cleanser before shaping keeps the surface oil-free and helps the tip color bond evenly.
How to add polka dots over french step by step
Dots go on only after the french is cured and the top of that layer is tack-free. Load the dotting tool, touch straight down, and lift straight up without dragging. Reload between every two or three dots so each one keeps the same volume and gloss.
Dots on the tip vs the base
Tip dots echo the french and read as a finishing accent, while base dots near the cuticle pull the eye down and balance a long nail. Pick one zone per nail so the design stays uncluttered. Mixing both zones on the same nail works only on coffin or extra-long shapes where there is enough surface area to keep the dots from crowding each other.
Choosing dot size and color
Smaller dots suit short nails, and a single oversized dot can anchor a longer one. Keep no more than two dot sizes per nail so the pattern stays intentional rather than scattered. When mixing sizes, place the larger dot closest to the cuticle and step down to smaller dots toward the tip for a natural visual flow.
How to layer and seal without smudging
Cure the dots on their own before any top coat touches them, since a wet brush over fresh art is what smears it. A textured finish like Terrazzo T24 seals the design and adds a speckled depth that complements the dots. Check the edges of each dot after curing — any dot that has spread or lost its round shape should be cleaned up with a fine brush and a drop of cleanser before the top coat goes on.
Float the top coat in one pass without pressing into the dots, then cure the full time your lamp calls for. With a Gel UV Hybrid system, a complete cure is what locks the layers so nothing lifts at the edge. If the top coat pools around a dot rather than flowing evenly, reduce the amount on your brush and apply with a lighter, gliding stroke.
Pro tips for a balanced french-and-dots look
Restraint reads as polish here, so cover two or three nails with dots and leave the rest as a plain french. From our hands-on work, the best french polka dot nails keep the dot color pulled from the french palette rather than fighting it. Map the dot placement on paper before you touch the nail so spacing stays even across all ten.
Frequently asked questions about french polka dot nails
Should I do the french or the dots first?
The french line always goes first and cures fully before any dots land on top. Dots placed on a wet smile line drag and lose their round shape.
Do I need a special brush for the french line?
A short flat brush angled across the tip gives the crispest arc, though a fine liner works for narrow nails. The key is wiping the brush clean between strokes so the edge stays sharp.
How do I keep the design from smudging?
Cure each layer on its own before adding the next, and float the top coat in a single pass without pressing into the dots. Skipping the cure between art and top coat is the most common cause of smearing.